Christmas-y Notes in a Little Box

Hello hello! It’s like 2 weeks ’til Christmas, and 2 days ’til Hanukkah  – how’s your holiday crafting going?? A while ago, in the thick of my card-production haze, I decided that what I absolutely needed to do–at that very moment–was to make something different. And then the Power Poppy 12 Days of Christmas December Challenge rolled in with some fabulous not-the-usual-cards-and-stuff inspiration. (Seriously, if you haven’t checked it out–click that link!)

Photo Dec 09, 11 41 21 PM

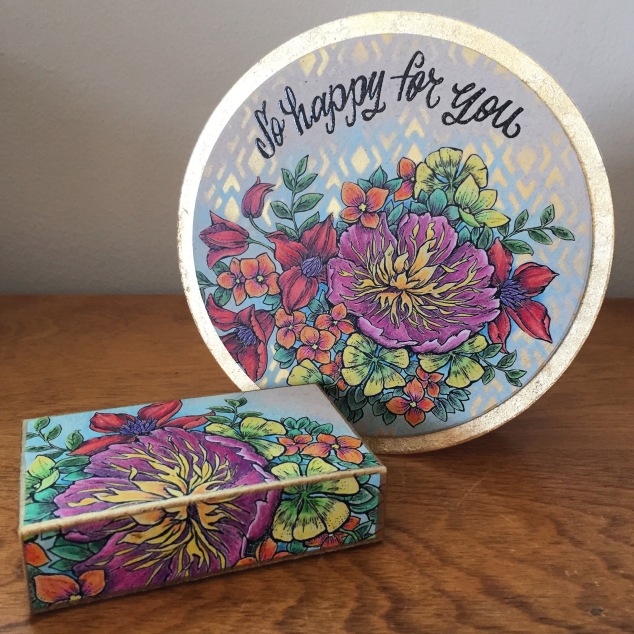
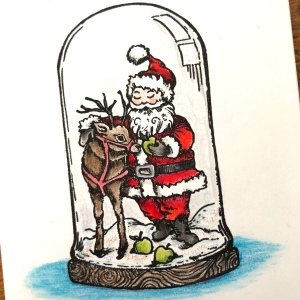
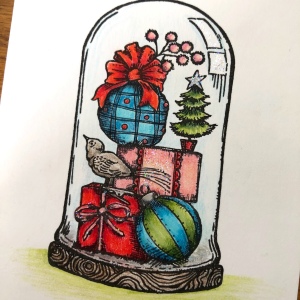
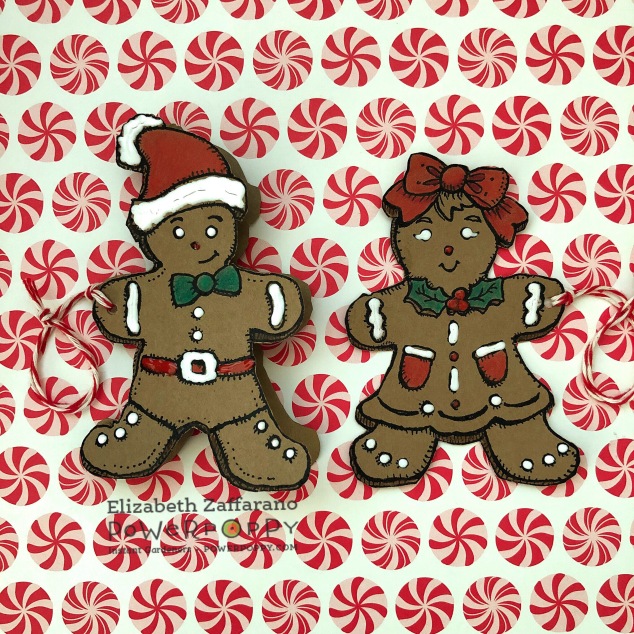
So I’ve been dying to play with the Under Glass: Christmas Traditions set from Power Poppy, and what I came up with were some little holiday-adjacent notes that can be used for post-holiday thank yous, or for tucking into a gift, or as just something to send when you get an unexpected card and need to reciprocate (!!) I love the little scenes that you can put into the cloches, to create your own little world in there…

Photo Dec 09, 11 46 20 PM

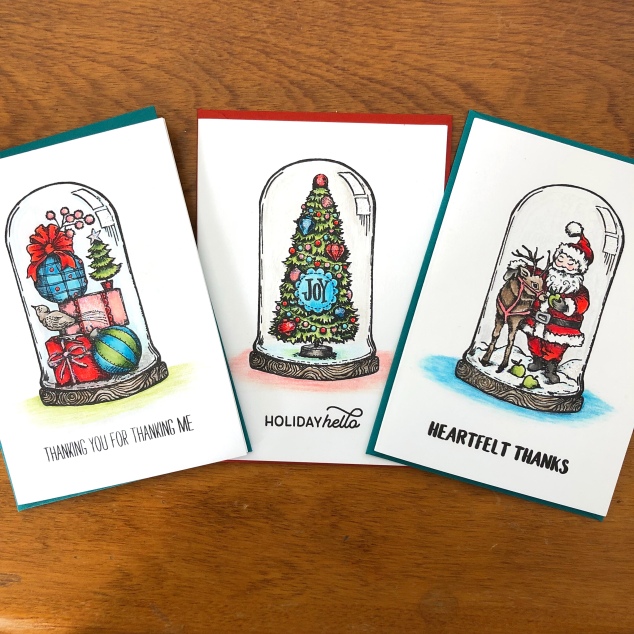
I colored these cards with colored pencils, in that same color palette I’ve been working with lately (below).

ac786f77e57000e4672255c2e59fc102

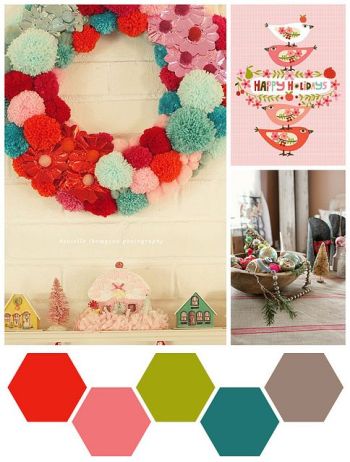
I’ve really enjoyed working with a few select colors. It seems to streamline how I choose to color each element of my projects (limited choices!), and I’ve learned a lot about shading/under coloring, because I can’t go looking for more colors to add in. Bonus: I can be lazy and just leave the pencils out on my table for a few weeks 😉

Photo Dec 09, 11 44 46 PM

Once these cards were colored, I added sparkle with Stickles and Wink of Stella, but these cards can also be colored very simply. I just like to get all extra sometimes.

Photo Dec 09, 11 43 56 PM

Oh, and the “Holiday Hello” sentiment is from Power Poppy.  The others are from a Waffle Flower set (“Heartfelt Thanks”) and Simon Says Stamp (“Thanking you for thanking me”). My notecards and envelopes came from Paper Source.

Photo Dec 09, 11 42 39 PM

To contain and present my cards, I finally got to use my Gift Box die from Lawn Fawn.  While I’m only showing off three card designs in this post, the completed box is sized to hold six 4 bar-sized notecards and envelopes (that’s 3-1/2″ x 4-7/8″ or 8.9 cm x 12.4 cm). What’s really ingenious about the die set is that you use one die for both the bottom of the box and the lid! That’s because you also cut some paper corners for assembling the top, and therefore ensure a perfect fit! If that sounds confusing, Lawn Fawn has a video demonstrating how to use the set, and it’s really much simpler than it sounds.

Photo Dec 09, 11 49 29 PM

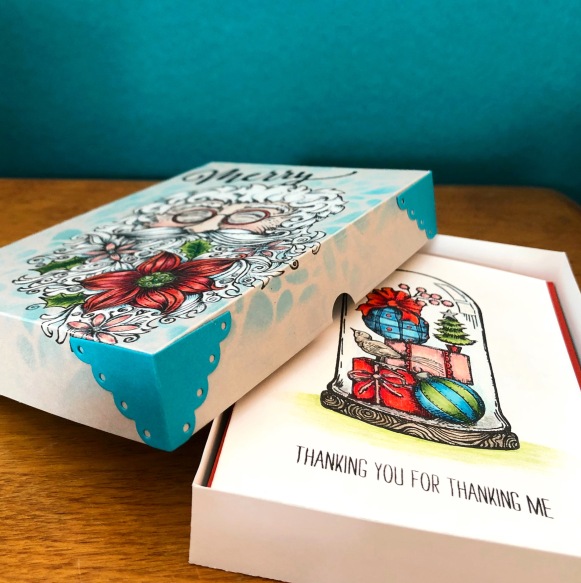
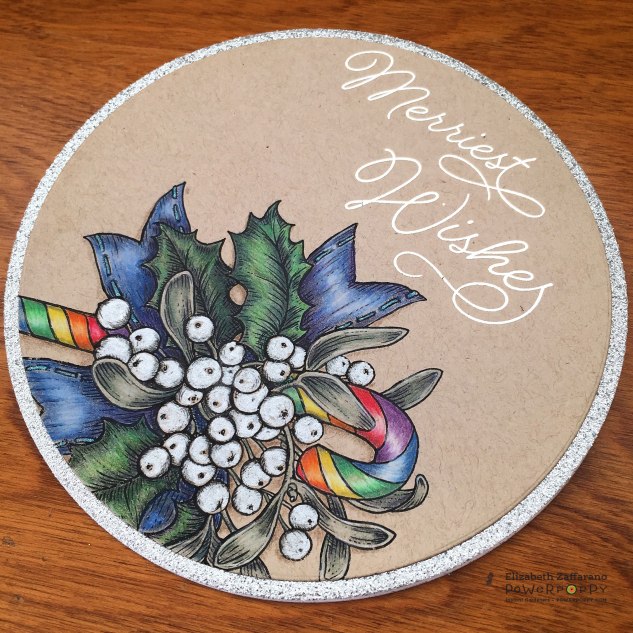
I stamped Flowering Santa onto some grey cardstock, and colored him in with that same color palette. Of course, I needed some more sparkle, so I sprayed the whole thing with some shimmer spray, as well as stenciled on shiny aqua embellishment mousse around my Santa.  I also added some glittery Nuvo drops to the flower centers, and a glittery heat-embossed “Merry” sentiment.  Then I assembled the box lid and bottom, and packed it with the note cards.

Photo Dec 09, 10 30 38 AM

This was a fun project to put together.  You can go as simple or as all-out as you want for decorating and coloring, and customize the contents for any recipient.

Gingerbread Family – the sweetest new digi from Power Poppy!

There’s a new digital stamp coming out for Power Poppy’s Happiest Holidays 2017, and it’s all about the cookies! Meet Gingerbread Family:

preview-full-PPOCT1703D_GingerbreadFamily

This set has unlimited “decorating” potential! Have lots of fun coloring up all that icing, and making a sweet scene with the gingerbread house and ginger folk.  There’s also some great sentiments that can be used on all sorts of gifting and holiday tags and cards.

For my post today, I took one look at the gingerbread boy and girl and knew I needed to make some tags! Especially because there’s a back side to each cookie! How fun is that?

final

I copied the images into Pages, and sized each one to about 3″ x 4″ (7.6 cm x 10.2 cm), then printed them on some kraft card stock.  One thing I love about digital stamps is that you can make stuff as small or as big your printer can handle, and this size is perfect for a gift tag, as there’s plenty of room for writing “To” and “From” or even a little note.

Because the images are designed to fit together, I needed to do some fussy cutting. Fortunately, Marcella designed the ginger folk with nice and distinct edges, so running the scissors around was fast and easy (Fact: Each image took me approximately the run time of “Hungry Like the Wolf” by Duran Duran or 3 minutes 40 seconds). If you have one of those digital/scanning electronic cutters, you can make a whole troop of gingerbread tags in a flash (are you listening Santa?).

final

Ever since I heard rumors that a new cookie-themed digi stamp stamp set was in the works, I’ve wanted to try using enamel drops to mimic frosting/icing, and I finally got my chance.  To add decorative details to my ginger people, I tried out the Nuvo Crystal Drops in Gloss White and Red Berry. I love the dimensional look, although you can see that the white cracked a bit: looks like real royal icing to me, but I’m going to blame the incredibly dry heat wave we’ve been having in Southern California as well.  It was 90F in the room when I applied the drops and I think they got a little baked!

I also added a little more color with some pencils.  I chose a darker brown for the cookie edges to give dimension, and scarlet red and emerald green for greenery, bows and bowties. I also used just pencil on the back of the ginger boy, but you could go for dimension on both sides.  I think the pencil looks wonderful and surprisingly bright on top of that brown base.

final-1

I assembled the ginger boy as a folding tag, tying the string through one of his hands.  I did the same with the ginger girl, although I left as a flat tag. Look at how nicely that ginger boy stands up – I bet these ginger folk would make the cutest placecards for a cookie-decorating party.

Ready to see more sweet ideas from this new holiday digital stamp set?
Nancy
Cheryl
Power Poppy blog


Light-up Dracula Halloween Cards

IMG_0228

For the last few years, I have been making extra spooky Halloween cards to send out to friends and family.  When the Monstrous stamp set from Tim Holtz/Stampers Anonymous debuted a few months ago, I found this year’s inspiration!  The vampire in the set is so dapper and is even wearing that classic horror movie cape! So I definitely wanted my card to have some stylish gothic-looking elements to it, and maybe an electrifying surprise too!

img_0136

Once I had stamped and colored my Draculas, I built up the card design  with a stormy night background, and some die cuts that reminded me of abandoned rooms in a crumbling castle. Then I added a sentiment from the same stamp set.

Then, it was time for the special effects!

IMG_0229

Want to see this card in action? Check out my Instagram post for a quick video!

I mean, how scary is a vampire with glowing red eyes?! To make this happen, I used the starter kit from Chibitronics, as well as some extra LED light stickers.  I really like the little activity booklet that comes the starter kit, because it guides you through creating different types of circuits–you get to practice before you start building your card. I wanted the card recipients to press on the “Wicked” from the sentiment on the front to light up Dracula’s eyes.

I cut openings into the various layers of the card for the lights to shine through, and marked the eye locations on the card base.  Then I assembled the front of the card, including slipping some red-colored acetate behind the vampire’s eye holes.

img_0108Because I was planning to mail these cards, I needed to figure out a way to get the lights to shine by pressing on the card, but not be too thick or fragile. I decided to place the battery in the center of the card, and build my circuit with a switch that got pressed at the bottom of the card.  I also made a basic foam backing from 3mm fun foam. I figured that eliminating the usual many pieces of foam tape might help the card not get bent or creased in the mail.IMG_0215
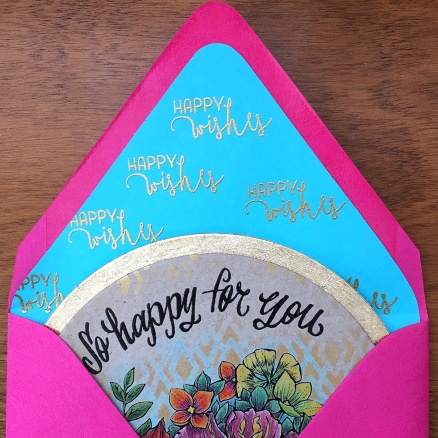
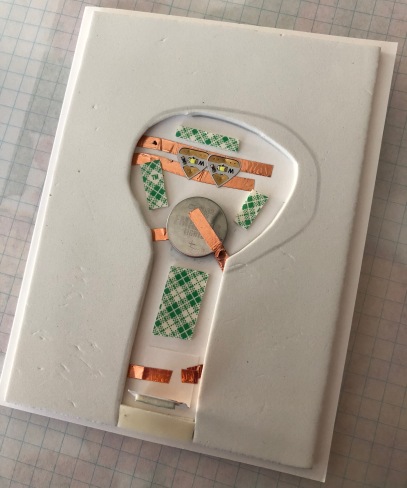
I decorated the inside of the card too.  Figured I sent so much time on the card front, might as well give the interior special treatment as well.  I used a stencil and sponged some Deco mousse and then heat-embossed a sentiment from the Monstrous stamp set.IMG_0231

Whenever I mail out a thick card, I like to use a slightly bigger envelope. I just had to go a bit extra on the envelopes, so I stamped a ruined church on the address side, and used my eclipse stamps for a spooky full moon effect.  The four cards I sent out all arrived in great condition, and my recipients happily sent me videos and photos of Dracula’s eyes lighting up.  I’ll call that a Halloween win!IMG_0234


Latest Instant Garden release – Hops and Barley!

InstantGarden_ReleaseWeekGraphic_October2017It’s time for another Instant Garden release from Power Poppy! Today, Marcella Hawley is introducing Hops and Barley! This digital stamp set features a gorgeous tumble of harvest botanicals, as well as a few libation-themed sentiments. Barley and hops have been used in the brewing of beer for millennia, but they are lovely and interesting plants on their own as well.hopsbarleybook

In fact, let me lay some plant facts on ya: Did you know that hops are called Humulus Lupulus (the latter being Latin for “little wolf”) after an ancient Roman saying “wild among the willows, like wolves among sheep,” to describe their growing habits? And barley has a Roman connection too! Gladiators were sometimes referred to as hordearii meaning “barley men,” because it was such a big part of their diet. Conclusion: this stamp set would be perfect for any occasion that needs some warrior-type energy.hopsbarleydetailleft
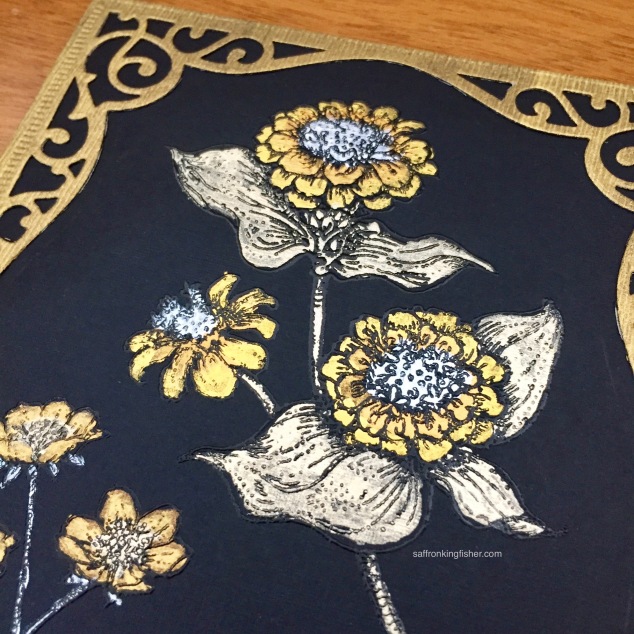
But for this post, I decided to take my inspiration from the Ben Franklin sentiment: “Beer is proof that God loves us and wants us to be happy,” and make a fun sign of sorts. I put the Hops & Barley image into Pages, and then duplicated and flipped it, so the images surrounded the quote.hopsbarleyflat
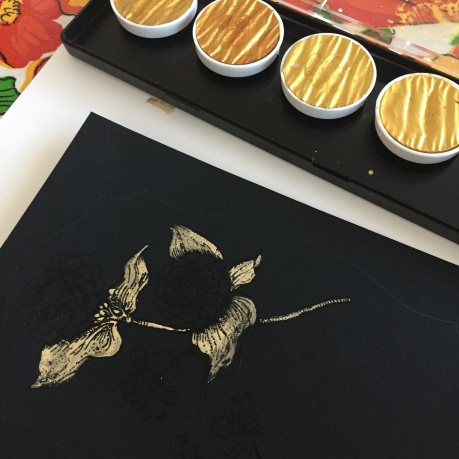
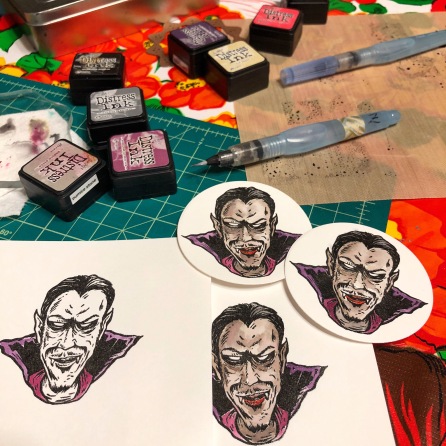
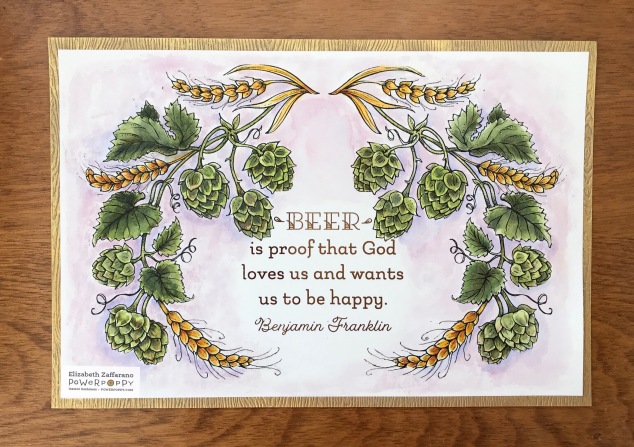
I used my little Minc to add gold foil to just the sentiment (this is Bristol paper), and then colored the hops, barley and background with distress inks and a water brush.hopsbarleydetailright
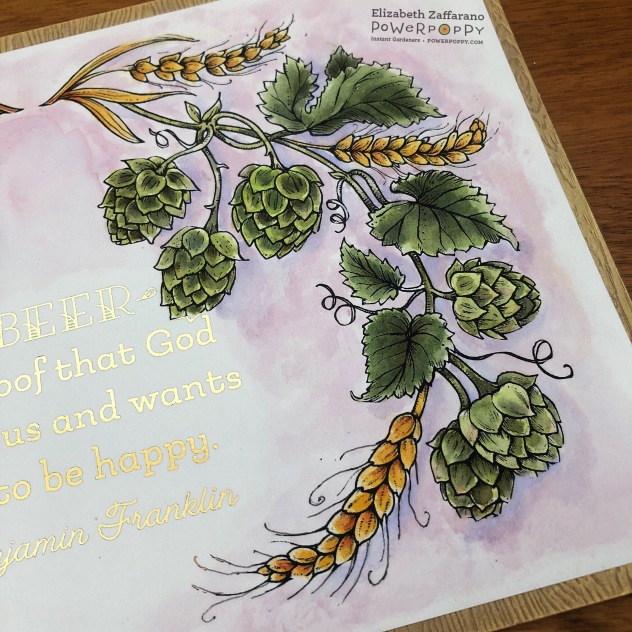
I mounted the panel onto woodgrain-embossed cardstock that I swiped with some gold Nuvo mousse.  I also added some gold Perfect Pearls details to the barley kernels.hopsbarleygolddetail

I think this sign could make a fun gift for anyone who’s getting into home brewing, or who just enjoys beers and ales that feature hops.

hopsbarleystandingBefore you head off today…LOOK AT WHAT IS COMING SOON FROM POWER POPPY! The Happiest Holiday clear stamp collection rolls out previews starting tomorrow, October 16th, and everything will be available for purchase on the 24th! There’s Santas, florals, confections…It’s gonna be epic!PowerPoppy_HappiestHoliday2017_Previews

Now you can go check out what the other Instant Gardeners have created with Hops and Barley.  Enjoy!
Nancy
Broni
Barbara

SaveSave

Peep-in-chief is Getting Hitched!

WeddingHopGFX

I’m so excited to be share the news: Marcella Hawley -creatrix of Power Poppy Stamps– is getting married to her beau Doug tomorrow!  The design team thought it would be fun to have a blog hop to wish her great happiness on her special day, as well as for future bliss together.

IMG_4961

Marcella loves her gardens around her home: she affectionately calls them her “terrarium.” So there definitely needed to be plenty of blooms in what I made for the occasion.  As inspiration, I thought of a perfect late-summer day: sunny, gold-tinged skies and richly-colored foliage and flowers. The Power Poppy digital stamp Luminous Bouquet came to mind, so I printed that off and got to creating.

I ended up making two things! A sweet little keepsake box and a gilt-edged card.

IMG_4960

For the box, I colored up that beautiful bouquet with colored pencils on kraft-colored cardstock, and then die-cut the image with Lawn Fawn’s Fancy Box die. I thought this made a perfectly-sized little token that could be used to hold a few dried petals from the bride’s bouquet or groom’s boutonnière, or maybe a few beads or bit of lace that got snagged during all of the merry making.  I lined the interior of the box with some thin aqua paper. Before I assembled the box, I heat-embossed the wedding date with gold on the inside of the lid.

IMG_4974

Once the box was put together, I added a little more shine by swiping all of the edges with a gold-leafing pen.

IMG_4980

The card has a border of bright gilding flakes, reminiscent of the rings exchanged during the wedding vows. The bouquet is colored with the same bright colors, and accented with some gold stenciling, and everything is glowy against the kraft; just like I imagine Marcella and Doug will be glowing on their special day.

IMG_4976

I’ll be sending these paper crafts along to the couple, as soon as I finish this blog post! I had so much fun creating for the lady who makes such beautiful designs for us. Congratulations to Marcella and Doug, and to their family. Please take and share millions of photos!

Marriage is an amazing adventure,
even when you already 
know each other by heart…
Best wishes for all you have yet
to discover together!

IMG_4959

Be sure to stop and see what lovely things the rest of the design team has crafted and penned to wish the Newlyweds-to-be the best wedding ever!  If you’d love to leave Marcy and Doug a special message, please leave that on the Power Poppy Blog – I know they will read each and every one of them!
Allison Cope
Christine Okken
Cindy Lawrence
Julie Koerber
Kathy Jones
Katie Sims
Stacy Morgan
Tosha Leyendekker
Jennifer Dove
Broni Holcombe
Cheryl Scrivens
Barb Walker
Nancy Sheads
Jessie Banks

SaveSave

SaveSave

Merriest Berries – a new digi from Power Poppy!

InstantGarden_ReleaseWeekGraphic_Sept2017

Hello! Have you seen the brand-new digital stamp set from Power Poppy yet? It’s called Merriest Berries, and it has seasonal greenery, ribbons, and yes – lots of berries! There’s three different styles of be-ribboned clusters, and even a candy cane nestled in there.  But my favorite feature of this release might be the sentiments: they say “Merriest Wishes” in sleek script, and the words are available together and separated, so you can customize to your heart’s content.

Merriest Berries by Power Poppy rainbow and silver

I decided to make a circle-shaped card with the candy cane option, so I was glad that I could move around the “Merriest” and the “Wishes” to get everything to fit. I thought a shiny rainbow theme would suit, as we are still in the throes of summer here in SoCal.  I colored up the image with my colored pencils, and added silver accents via foiling, a silver gel pen, and a silver-glittered background. I discovered that you can shade (somewhat) over the metallic pen, and I added a hint of shadow here and there.

Merriest Berries by Power Poppy showing the silver shine

I love how colored pencil pops against kraft card stock, and the berries and sentiment glow in the light.

Merriest Berries standing card

Merriest Berries is available in the Power Poppy shop  now, and you can be downloading and coloring in no time!

Be sure to check out more awesome creations by the design team here:
Nancy
Broni
Rhea
Barbara
Jessie
Jennifer

One more thing! This is my first post as an Instant Gardener for Power Poppy, and I couldn’t be more thrilled to join such a special and talented team.  Look for more posts from me here, and occasionally on the Power Poppy blog.

Have a great day! I love questions and comments, so don’t be shy 🙂

Faux Damascene Cards with Metallic Watercolors

IMG_4716

Hi everyone! Today I’m showing off some dramatic and shiny cards that are reminiscent of the bold Damascene jewelry from Toledo in Spain.

These black and gold pieces (below) are made by inlaying precious foils onto a base metal, which is then oxidized to create that deep black background.  You’ll see pieces featuring flowers, birds, and geometric designs.

examples of damascene jewelry

Credits, clockwise from top left: 1, 2, 3, 4

I recently spent some of my birthday money on the Finetec Pearl Colors palette (below). Isn’t it gorgeous? The bright metallic pots sitting in their black case inspired me to try to get that Damascene effect on paper.M600

For my cards, I used the Vibrant Thanks stamp set from Power Poppy, and clear heat-embossed the Zinnia and Coreopsis onto black card stock.

Then, I just started laying color from the palette onto the stamped images, using a size 0 watercolor brush.  The embossing acted as a resist, and kept the details from getting painted over.

IMG_4710

I am not a painter, so I was pleased at how easily the flowers filled in.  Between the two cards, I managed to use all the golds (and silver) in the palette!

IMG_4715

Once the paint was dry, I added metallic sentiments.  I also painted, then die cut frames to give the panels the look of bezeled brooches.

IMG_4724

I think they look so cool in the sunlight! If you don’t have a Finetec palette, other metallic paints, metallic gouache, Perfect Pearls mixed with water, or even metallic pens would give a similar effect.

IMG_4695

Thanks so much for reading! Feel free to leave a comment or ask a question.

Project info:
Paints: M600 Pearl Colors palette (Finetec)
Stamp sets: Vibrant Thanks, Tree of Life, Olive & Oak Expanded (Power Poppy)

SaveSave

SaveSave